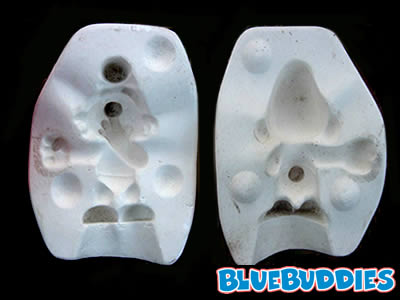
So here's the process I said I'd describe for making plaster molds.
First you gather all the materials: the object of your choice (preferrably small, smooth, hard, and compact-- no fibers or hairs), clay (does not have to be absolutely plastic), plaster mix (that's a whole different story. you just take the plaster and mix it into water in the right proportions), Murphy's Oil-Soap (it's a wood-floor cleaner, and our release agent), a brush (not too small), and a lot of luck, because it's likely you'll mess up the first (or second or third) time(s).
Take the clay and beat it into a cube/rectangular-prism. The clay does have to have enough plasticity so that you can push your object into the clay. The cube/rectangular-prism should be tall enough to where you can push your object halfway into the clay, and there will still be an inch of clay around and below the object.
Now you push your object halfway into the clay.
Build up walls (at least half an inch thick) around the cube/rectangular-prism. The wall should be a decent height, taller than the top of the object. Just keep in mind you will be pouring the plaster into the grave-thing you've just constructed.
Brush the Murphy's Oil-Soap directly onto the object and the inside walls of the clay-grave-thing.
Pour the plaster into the grave-thing. (Lightly!) tap it with your brush to make any bubbles below the surface rise. Not too hard, though.
Wait for about a day for the plaster to dry. Take off the clay, and stick that junk in a trash can. Just keep your object and the plaster mold.
This concludes the making of plaster mold part 1. I'll update later with part 2.
Subscribe to:
Post Comments (Atom)

No comments:
Post a Comment